Here’s a short list of drivers that are found to be incompatiable so far. Wireless_19.50.1_PROSet64_Win10: 18.33.6.2 (2/19/2017) Wireless_19.40.0_PROSet64_Win10: 18.33.5.1 (10/9/2016) Wireless_19.30.0_PROSet64_Win10: 18.33.5.1 (10/9/2016) Wireless_19.20.3_PROSet64_Win10: 18.33.5.1 (10/9/2016) Wireless_19.20.0_PROSet64_Win10: 18.33.3.2 (5/3/2016) Wireless_19.10.0_PROSet64_Win10: 18.33.3.2 (5/3/2016) Wireless_19.2.0_PROSet64_Win10: 18.33.3.2 (5/3/2016) Wireless_19.1.0_PROSet64_Win10: 18.33.3.2 (5/3/2016) Wireless_19.0.1_PROSet64_Win10: 18.33.3.2 (5/3/2016) Wireless_18.40.4_PROSet64_Win10: 18.33.3.2 (5/3/2016) Wireless_18.40.0_PROSet64_Win10: 18.33.0.2 (1/28/2016) Wireless_18.33.0_PROSet64_Win10: 18.33.0.1 (1/5/2016) Wireless_18.32.0_PROSet64_Win10: 18.32.0.5 (12/22/2015) Wireless_18.30.0_PROSet_64: 18.30.0.9 (11/3/2015) In this guide i will walk you through the work arounds that will hopefully resolve this for you.
Method 1: Disabling Receive segment coalescing (RSC) on your Wireless Adapter
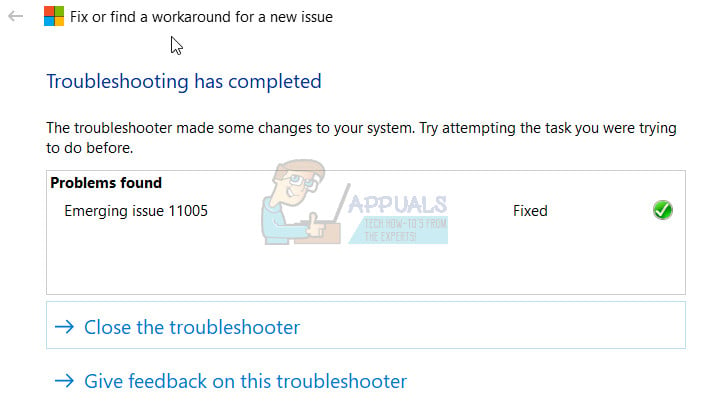
In this method, we will first run the .diagnostic tool provided by Microsoft, then test and then manually disable RSC if the problem isn’t fixed by the diagnostic file. Click here to download the file and run/open it. Click Next, wait for the scan to finish and Next again for the issue if it finds it, once you get the problem found and issue fixed screen from the diagnostic tool, close it and test to see if the issue is now resolved.
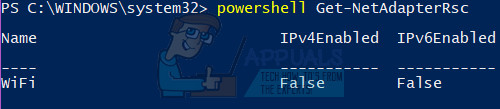
If the issue is still not resolved then manually disable RSC following these steps: Verify that the values are disabled by typing powershell Get-NetAdapterRsc. Then test to see if the Wifi slowness has been fixed if not move to Method 2.
Method 2: Change MTU Value to 1400 for your Wifi
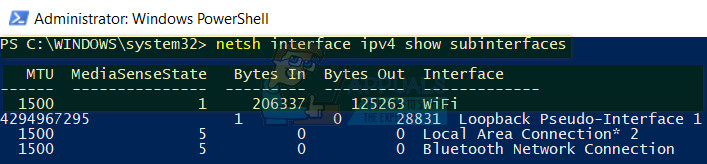
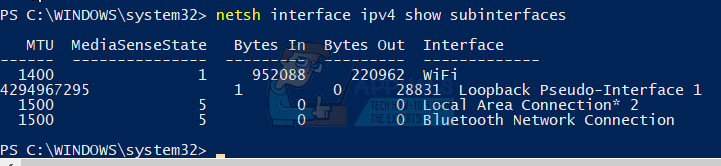
In the Powershell Prompt, Check your current MTU Value’s. These values seems to conflict with the driver versions in a response by PB.Anton, the following values seems to work with the varying driver versions. 17.15.0.5 driver: MTU=1400: WORKS 17.15.0.5 driver: MTU=1500: WORKS 19.50.1.5 driver: MTU=1400: WORKS 19.50.1.5 driver: MTU=1500: DOES NOT WORK If you are not using an Intel Wifi Adapter, you should still attempt this method to test 1400, and 1500 mtu values with your adapter and driver version. To check the values type netsh interface ipv4 show subinterfaces and press ENTER.
So the value for my WiFi adapter is 1500. To change it to 1400, note down the name of your Interface and then type the following command: netsh interface ipv4 set subinterface “YOUR_WIRELESS_CONNECTION_NAME” mtu=1400 store=persistent (make sure the “” are kept” when replacing the “Your_Wireless_Connection_Name” with “Your Value”.
Verify that the MTU is now 1400 by running the show command.
Now check to see if the issue is resolved, if not then proceed to Method 3.
Method 3: For Intel Wifi Adapter’s
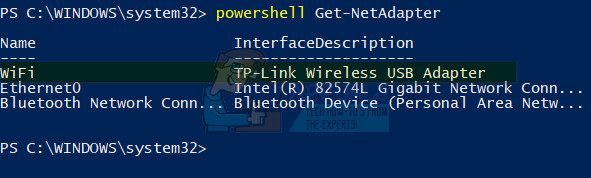
This method is intended to be used for Intel Wifi Adapters but if you are tech-savvy you can apply the steps here to any other Wifi Adapter and experiment with previous driver versions. For Method 3, we will be using the Intel Driver Version 17.15.0.5 (02/22/2015) but before we get started, a couple of points needs to be understood. Windows automatically updates the drivers, so even if you install the older version Windows can override and install the latest one which will result in the issue recurring therefore it is important that you follow this guide in the order it is listed to prevent reinstallation of newer version of the Intel driver. First check the driver version via PowerShell using the following command and filter out the Intel or your Network Adapter’s version by looking at the DeviceName and Driver Version. To do this, type the following command: gwmi Win32_PnPSignedDriver -Filter “DeviceClass = ‘NET’” | ft DeviceName,DriverVersion
This is just for your information, if the Driver Version is already 17.15.0.5 even then follow these steps and use this command to verify again later. First uninstall Intel PROset completely by going to Settings -> Apps -> Apps & Features. Then go to Device Manager “Hold the Windows Key and Press R”, type devmgmt.msc and Click OK. Expand Network Adapters and Right Click on the Intel Wireless Adapter -> Choose Properties and go to the Driver Tab, then use the Roll Back option to roll back to the previous version until the version and the driver date is Driver Version 17.15.0.5 (02/22/2015). If after a couple of attempts, it doesn’t get to this version of the driver then right click the Network Adapter, choose Update Driver and choose Browse my computer for driver software, then choose Let me pick from a list of available drivers on my computer, and choose the 17.15.0.5 version and install it. If it still can’t find the driver then you can download it from (here). Now if the driver was installed as part of rolling back to previous version, there is nothing else that needs to be done because Windows Update will not automatically update it, but if it was installed via any other means (stated above) then Windows can reinstall it and you need to follow this guide how to hide updates in windows 10 to prevent the older driver from getting updated
Fix: Desktop Icon Issues after Creators UpdateHow to Fix Low FPS issues after Creators UpdateFix: Windows 10 Creators Update Brightness IssuesFix: No Bluetooth after Creators Update on Windows 10