How To Communicate To The Arduino Board Through A USB Cable?
As we know the abstract of the project we will start downloading the software needed and collecting some hardware components for testing. We will use Arduino UNO for interfacing and then later for testing.
Step 1: Components Used (Hardware)
Step 2: Components Used (Software)
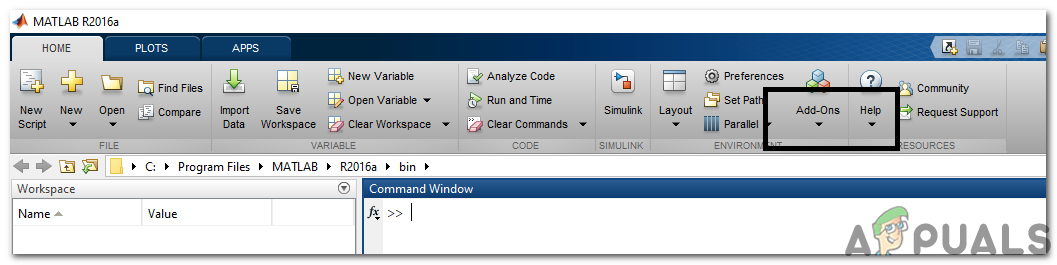
After arranging the hardware components we will look for the software that will be used in the project. We will install the latest version of MATLAB on our laptop or PC on which we are working. It is better to download MATLAB 2019 because it is the latest release from Mathworks. The link to the official website of Mathworks is available below for downloading the software.
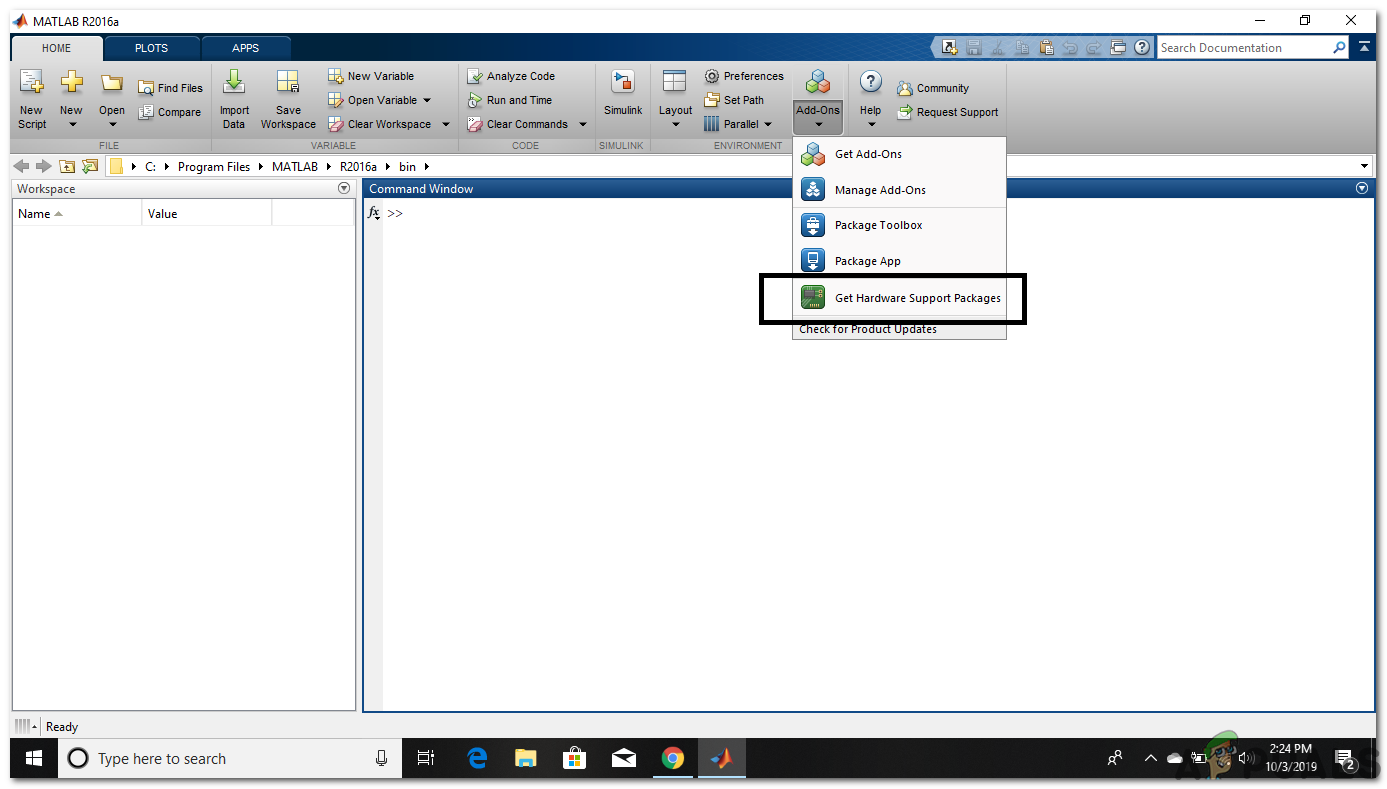
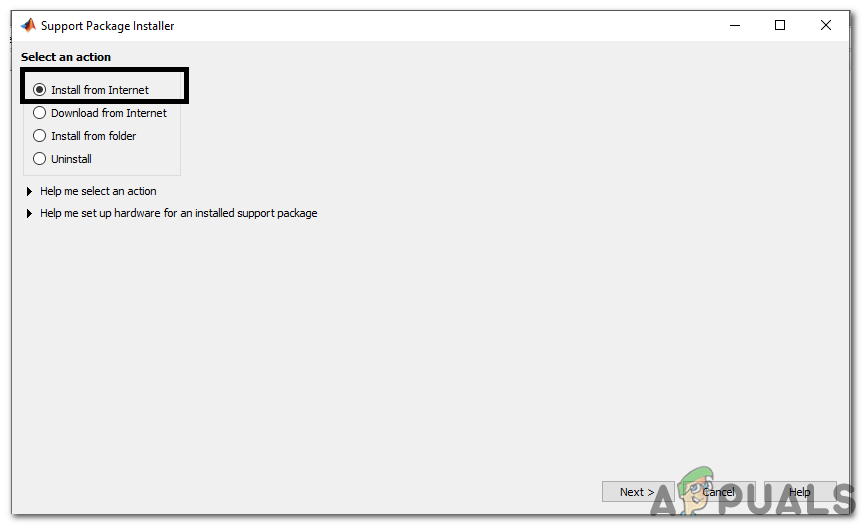
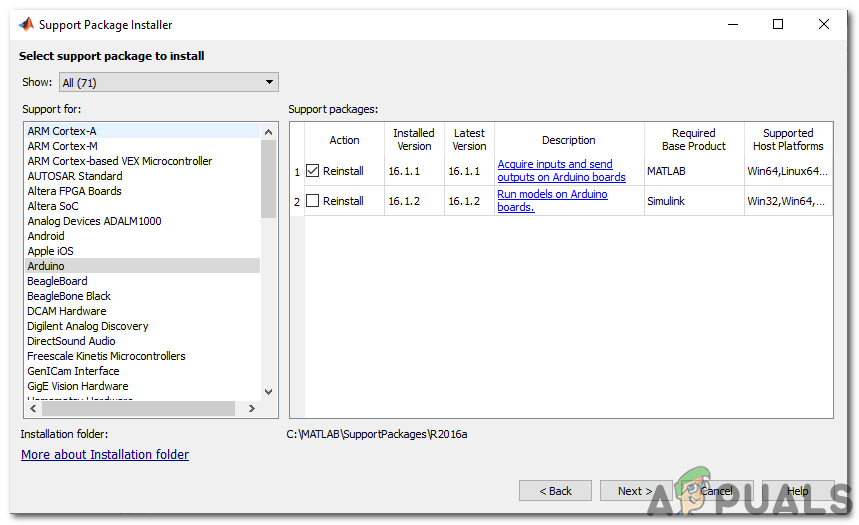
Step 3: Installing Hardware Support Packages
After clicking next a window will open asking for Login details of Mathworks Account. If you don’t have one please make an account and then proceed further. As I have already entered the Login details, the packages will be installed and now we are ready to do the testing.
Step 4: Verifying The Hardware Packages Installed
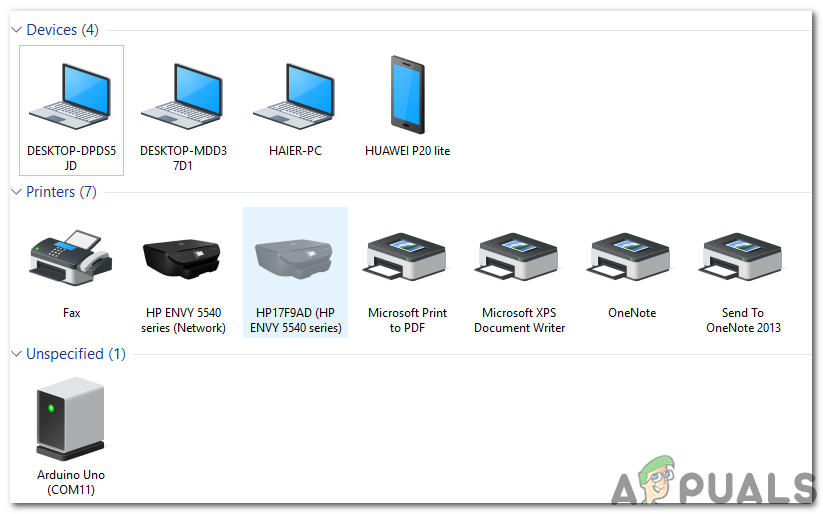
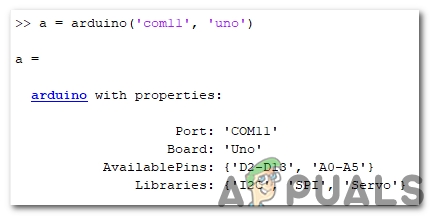
We have completed the installation of packages hence we will check whether they are appearing in MATLAB also. For that we will type the following command in the command window: Sometimes, there is more than one microcontroller connected to the PC so, we have to tell that which board are we talking to. For checking the port number we will go the Control Panel then Devices and Printers and check the COM port number: Now, we become to know that our Arduino is connected to COM11 so we will mention that port number in the Code. In my case the Port number is COM11 and it will be different in everyone’s PC so, change the port number in the code before compiling it : MATLAB will try to communicate with the Arduino Board and if the communication is successful some properties like the Port number, Model of the Board etc will be displayed on the screen. The variable named ‘a’ will be appearing in the workspace, and the following command will be used to clear the variable a.
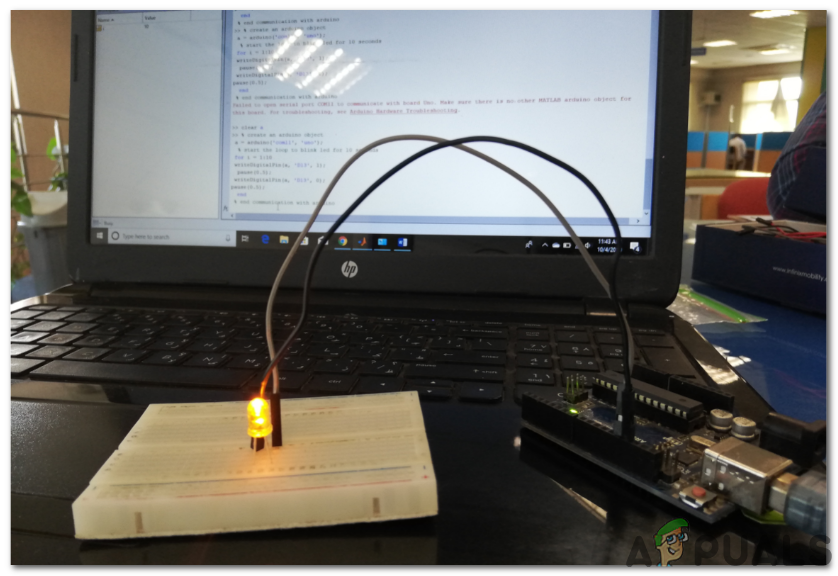
Step 5: Testing
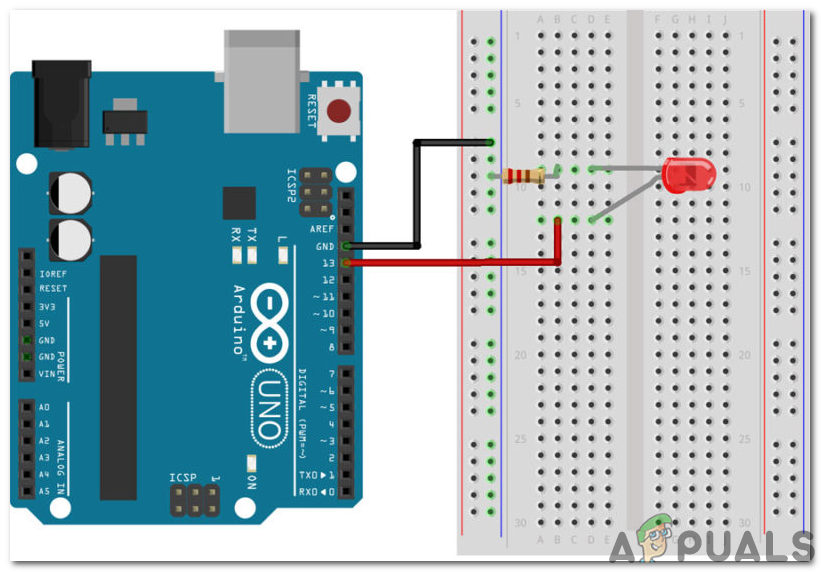
We will do the LED blink test on Arduino using MATLAB. As we have connected the Arduino board with a laptop or PC by a USB Cable and verified that the packages are installed now we do perform an LED blink test to check whether our hardware and software are working properly. There are two portions of the testing part. Download the MATLAB Code from Here Ensure there is no past Arduino variable stored in MATLAB, otherwise, MATLAB will show an error message. Save the m-file and then Run the Code. It will be seen that the LED blinks for a period of one second and then turn OFF. That’s it! We have finally interfaced with the Arduino UNO Board with MATLAB and now we can make some cool electronics projects using Arduino microcontroller and then control them using MATLAB.
How To Control Home Appliances Using MATLAB?How to Design Arduino Based Home Automation System Using TV Remote?How to Design A Touch Dimmer Circuit Using Arduino?How To Make A Smoke Alarm For Your Kitchen Using Arduino?